From Rubber to Refuge: The Ultimate Guide to Building a Tractor Tyre Garden Pond
Introduction: Why a Tyre Pond?
There's something deeply satisfying about turning waste into wonder. Old tractor tyres—those hulking rings of rubber that would otherwise sit in landfills for centuries—can be transformed into stunning garden ponds that attract wildlife, add visual interest, and give you a peaceful water feature to enjoy throughout the seasons.
The beauty of a tyre pond lies in its simplicity. You don't need to be a professional landscaper to create one, though understanding the principles that professionals use will save you from common mistakes. Whether you're a seasoned gardener or a complete novice, this guide will walk you through everything you need to know—from construction methods and wildlife safety to plant selection, water oxygenation, and even how to turn this hobby into a small business.
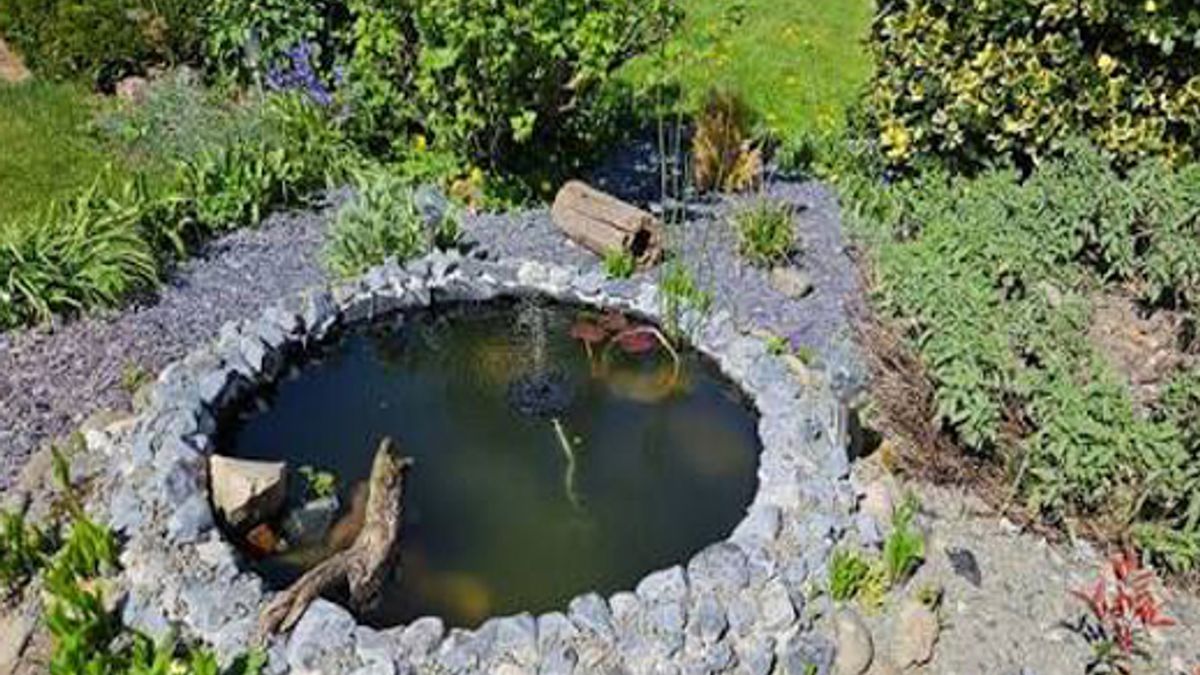
Section 1: Ecology and Recycling – Why Tyre Ponds Are a Green Win
Every year, over 1.5 billion tyres reach the end of their life globally. While some are recycled into rubber mulch or fuel, millions end up in illegal dumps or are stockpiled, creating environmental hazards. Tyre dumps are breeding grounds for mosquitoes, release toxic chemicals into soil and groundwater, and pose serious fire risks (tyre fires are notoriously hard to extinguish and release black smoke filled with carcinogens).
Building a tyre pond tackles this problem head‑on:
- Diverts waste from landfill – a single tractor tyre can weigh 50–100 kg; every pond you build keeps that rubber out of the dump.
- Reduces the need for new materials – instead of manufacturing a plastic preformed pond or using concrete, you repurpose an existing product, saving energy and raw resources.
- Creates a micro‑ecosystem – your pond becomes a habitat for frogs, newts, dragonflies, and birds, boosting local biodiversity.
- Inspires others – when neighbours and friends see your tyre pond, they often want one too, multiplying the environmental benefit.
In short, you’re not just making a garden feature; you’re actively cleaning up the planet, one tyre at a time.
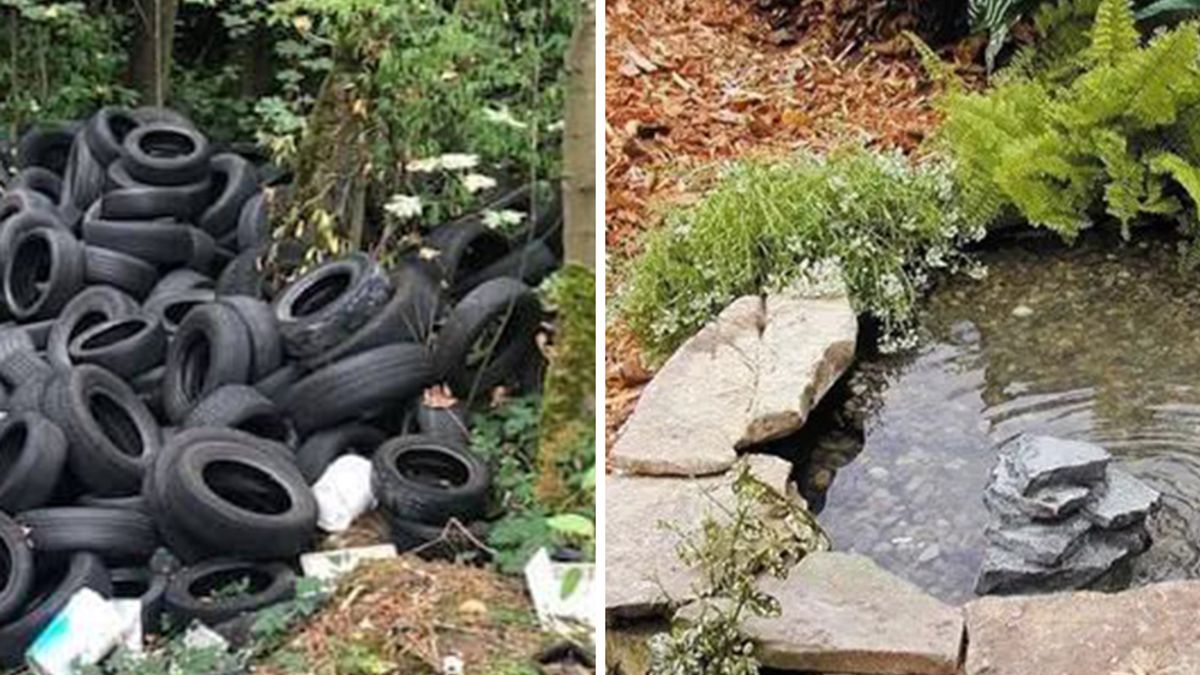
Section 2: The Professional Landscaper's Approach to Tyre Pond Construction
Choosing Your Tyre
Not all tyres are created equal when it comes to pond building. An old truck or tractor tyre that is not steel‑belted will make a sizeable pond, but any size tyre will do depending on how ambitious you want to be. The diameter and width of your tyre will determine the size of your pond, so think about the space you have available and the visual impact you want to achieve.
What You'll Need
Before you start digging, gather your materials:
- An old tractor tyre (or multiple tyres if you want a larger feature)
- A heavy‑duty pond liner – EPDM rubber is ideal (UV‑resistant, fish‑safe, and lasts 20–50 years)
- A shovel for digging
- A jigsaw or reciprocating saw for cutting the tyre
- Sand or old carpet for underlay to protect the liner
- Rocks and stones for edging and decoration
- Aquatic planting baskets and soil
Step‑by‑Step Construction
Step 1: Cut the Tyre
Using a jigsaw or reciprocating saw, cut the sidewall portion off one side of the tyre. This creates an open "bowl" shape. Water thrown over the tyre will lubricate the cutting process and make it easier. If you're using a tractor tyre, you may find the rubber is surprisingly easy to cut as it's often all rubber with no wire reinforcement.
Step 2: Dig Your Hole
Dig a hole that is slightly larger than the tyre and taper it down to about two feet deep. The hole should accommodate the tyre with the cut‑off edge facing upward. If you want the pond to sit partially above ground, leave a bit of the tyre rim exposed—this makes folding the liner easier.
Step 3: Add Underlay
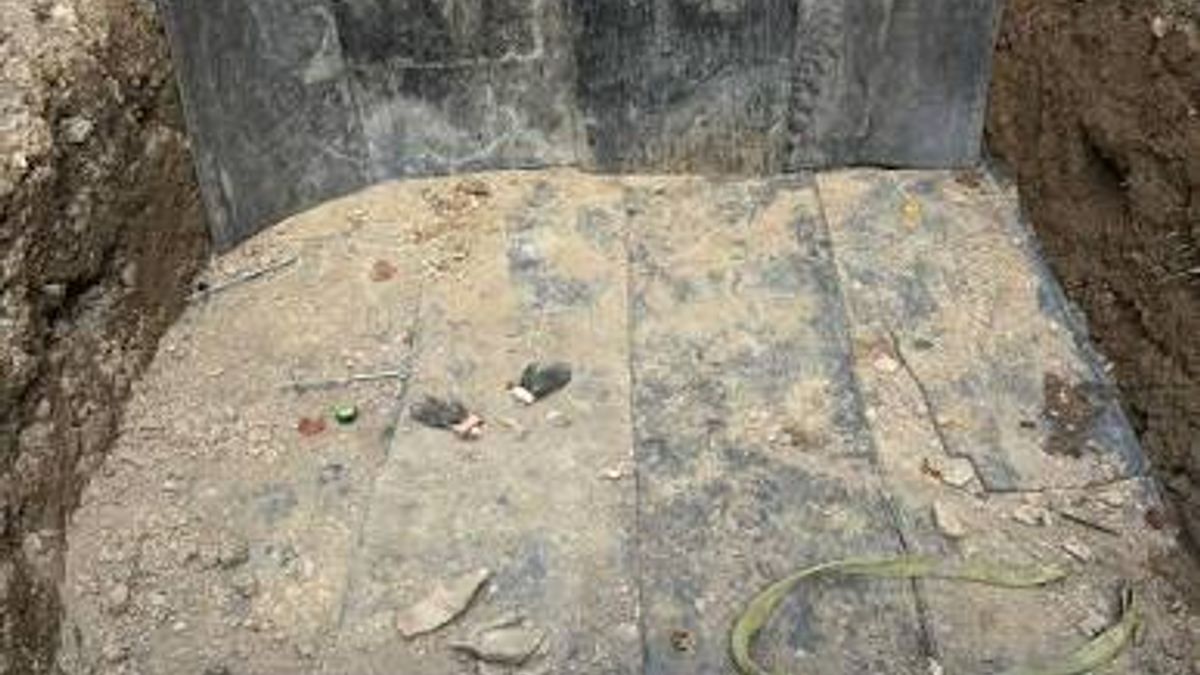
Line the hole with sand or old carpet to protect your liner from sharp stones or roots. Some builders use a technique called the "carpet sandwich"—plastic liner sandwiched between two layers of carpet scraps. This provides excellent protection against punctures.
Step 4: Install the Liner
Lay your heavy‑duty pond liner over the tyre, ensuring it covers the entire inner surface and extends at least one foot over the edges. Push the liner into the tyre to follow its shape. EPDM liner is the gold standard here—it's flexible, UV‑resistant, and safe for fish and wildlife.
Step 5: Fill and Fold
Start filling the pond with water. As the water goes in, the liner will stretch and pull into shape. Try to get as few creases as possible. Once filled, fold the excess liner over the outside of the tyre and trim neatly.
Step 6: Finish the Edges
Place rocks or bricks in a circular form around the pond to cover the plastic and hold it in place. Professional landscapers recommend anchoring the liner under a layer of sand and topsoil beyond the edge, then capping with flat stones to create a stable visual lip.
Step 7: Plant Around the Edge
Plant around the edge of the rocks to create hiding places for frogs and other wildlife. This also helps blend the pond into your garden.
Section 3: How NOT to Build a Tyre Pond—And Why It Matters
The Concrete Mistake
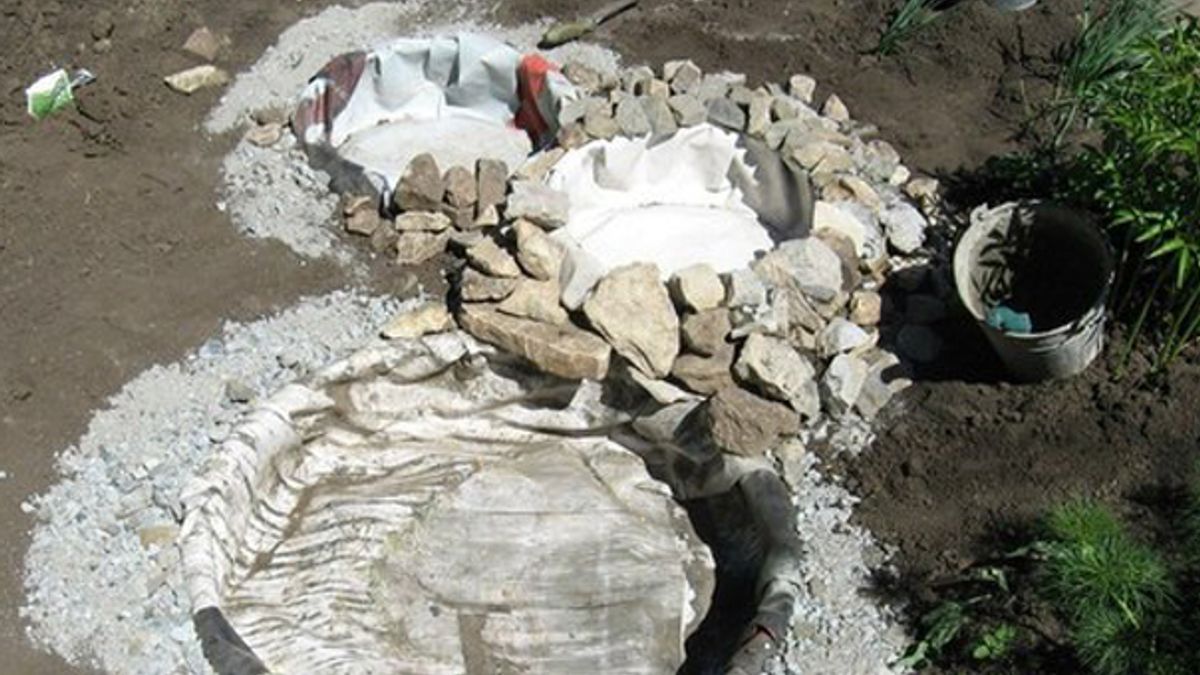
One common approach you'll see online is filling the centre hole of the tyre with concrete to seal it. While this works in theory, it creates a rigid, unnatural base that can crack over time, especially in freezing conditions. It also makes the pond impossible to move or adjust later. Professional landscapers almost always recommend a flexible liner instead—it's more forgiving, longer‑lasting, and creates a more natural environment for wildlife.
The Cheap Plastic Trap
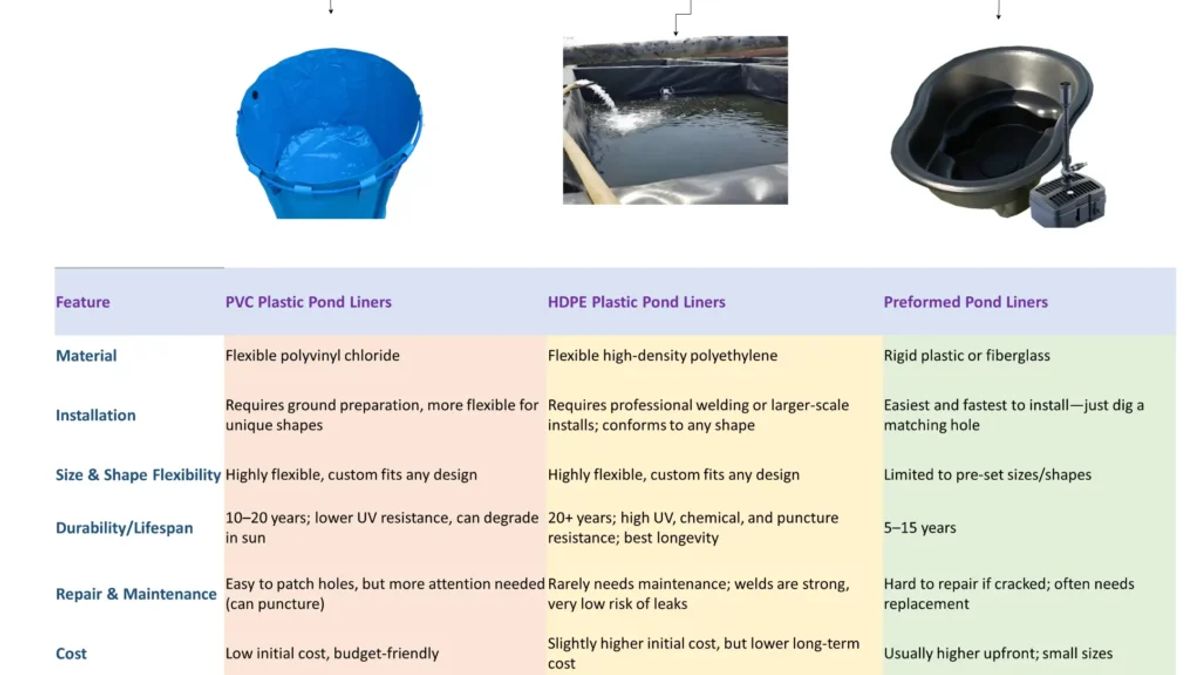
Using builder's plastic or standard PVC might save you money upfront, but it will deteriorate after a few years and cause leaks. Normal plastic is simply not thick enough for a garden pond. Invest in heavy‑duty EPDM or specialised pond liner—it's UV‑resistant and will last decades.
The No‑Underlay Shortcut
Skipping the underlay (sand, carpet, or geotextile fabric) is a recipe for disaster. Sharp stones or roots can puncture even the toughest liner. Geotextile underlayment reduces puncture risks by 95%. Don't cut this corner.
The Flat‑Bottomed Pond
A pond with steep, straight sides is not only unnatural but also dangerous for wildlife. Without a shallow, sloping 'beach' or shelves, animals that fall in have no way to climb out. Professional landscapers always create shelved or sloping edges to allow for a wide range of plants and safe wildlife access.
Section 4: Wildlife Safety—How to Stop Animals from Drowning
This is perhaps the most important section of this guide. A pond without an escape route is a death trap.
Any non‑aquatic animal that falls into a pond without an escape route will sadly drown. Most animals can instinctively swim and will swim around trying to find a way out. Your pond should have one or two safe exit points.
Building an Exit Ramp
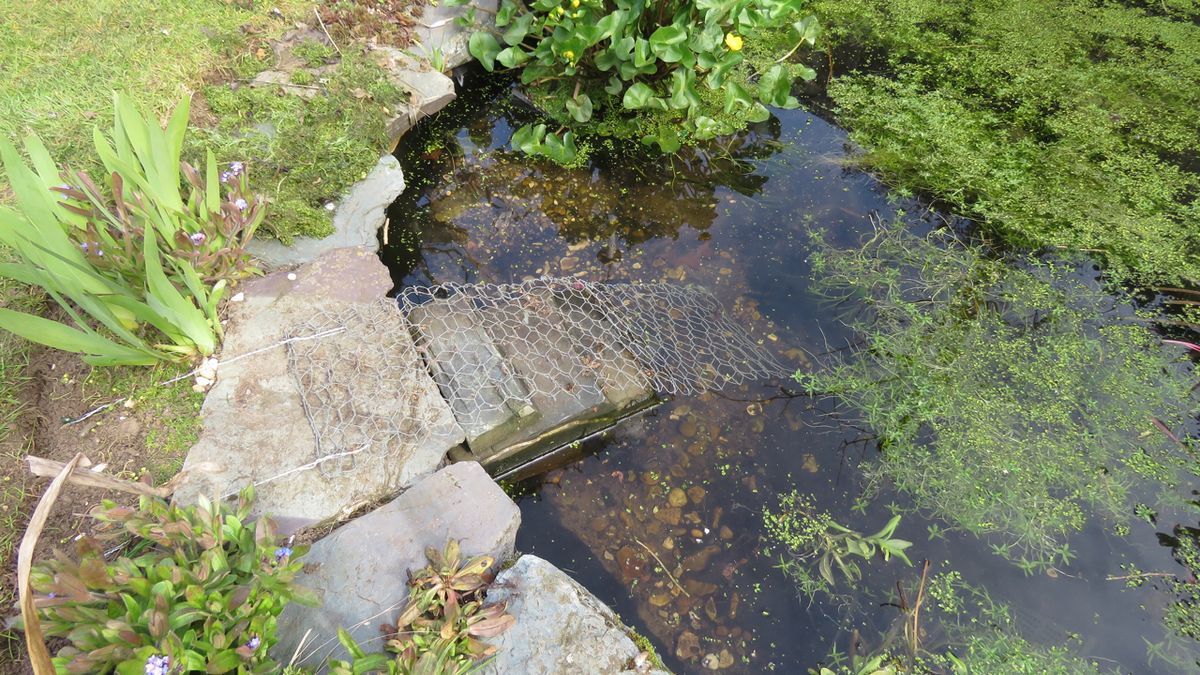
The RSPCA recommends building an exit ramp using rocks and bricks to form a slope inside the pond, from the bottom to the top edge. This allows small animals like hedgehogs, frogs, and toads to climb out if they fall in.
Key design principles for escape ramps:
- The ramp must meet the sides of the pond so animals can intercept it
- Ramps should have a maximum slope of 45 degrees for easy climbing
- The ramp must be firmly attached so it can't be knocked loose
- For raised ponds, add a ramp on the outside using a plank, branch, or pile of stones
Other Safety Measures
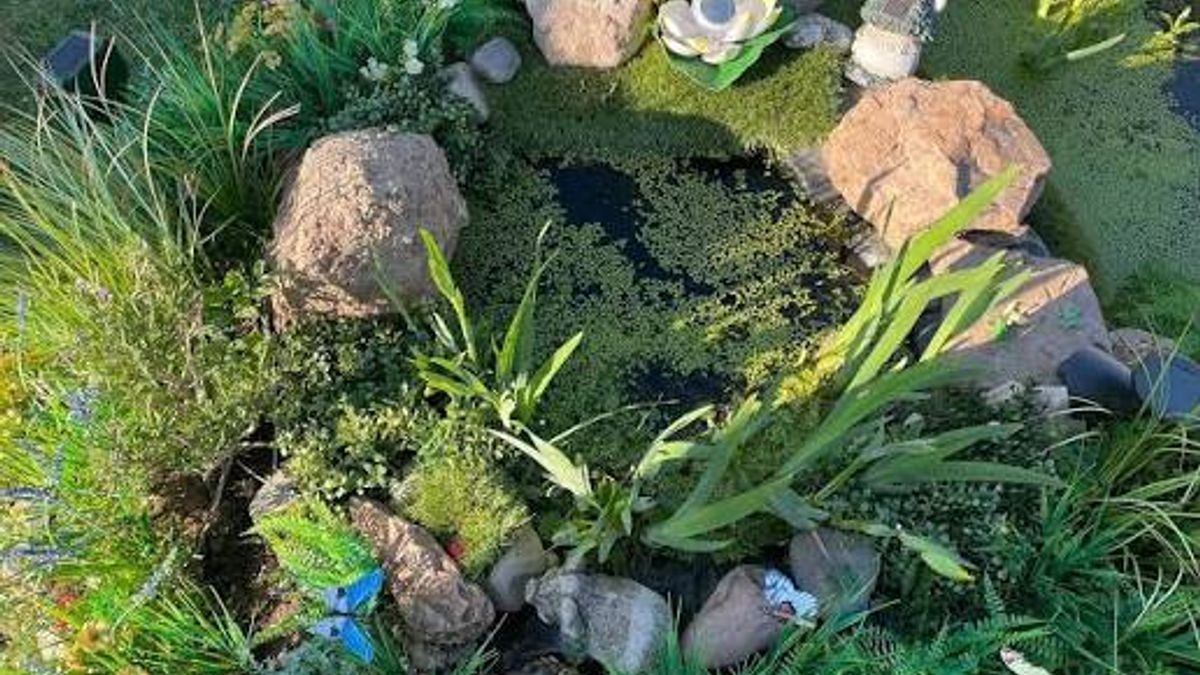
- Create a shallow, sloping 'beach' of pebbles that makes it easy for wildlife to get in and out
- Avoid steep sides—all ponds should have slightly sloping sides at about 20 degrees
- Don't use pond covers that mimic solid surfaces—they can mislead animals
- Position the pond near shelter like shrubs so wildlife feel safe
A Note on Fish
If you're building a wildlife pond, avoid adding fish—they eat tadpoles and other aquatic life. If you do want fish, aim for a surface area of at least 3.5 square metres to ensure the water stays well aerated.
Section 5: Where to Position Your Tyre Pond—Sun or Shade?
The location of your pond will determine its success. Get this wrong, and you'll be fighting algae blooms and stagnant water forever.
The Professional Recommendation
Ponds should be positioned in sun or partial shade—some shade over part of the pond helps to reduce problems with algae, but make sure at least half will be in full sun.
Full Sun vs. Partial Shade
What Professional Landscapers Look For
The ideal spot:
- Level ground with no tree roots or obstructions
- 6–8 hours of sunlight for flowering plants
- Close to patios or decks for easy viewing and enjoyment
- A quiet spot for wildlife ponds, but visible enough for you to enjoy
- Avoiding overhanging trees—full shade under trees is a maintenance nightmare, especially in autumn
What to avoid:
- Full shade—water lilies won't flower
- Under trees—falling leaves clog the pond
- Low spots where runoff enters the pond
- Areas where children have unsupervised access
Morning vs. Evening Sun
If you have a choice, morning sun with afternoon shade is often ideal. The morning sun warms the pond gradually, while afternoon shade prevents overheating in the hottest part of the day. This balance keeps algae in check while still allowing plants to photosynthesise.
Section 6: Water Plants for Your Tyre Pond
A healthy pond needs plants. They oxygenate the water, provide shade and shelter for wildlife, and keep the water clear.
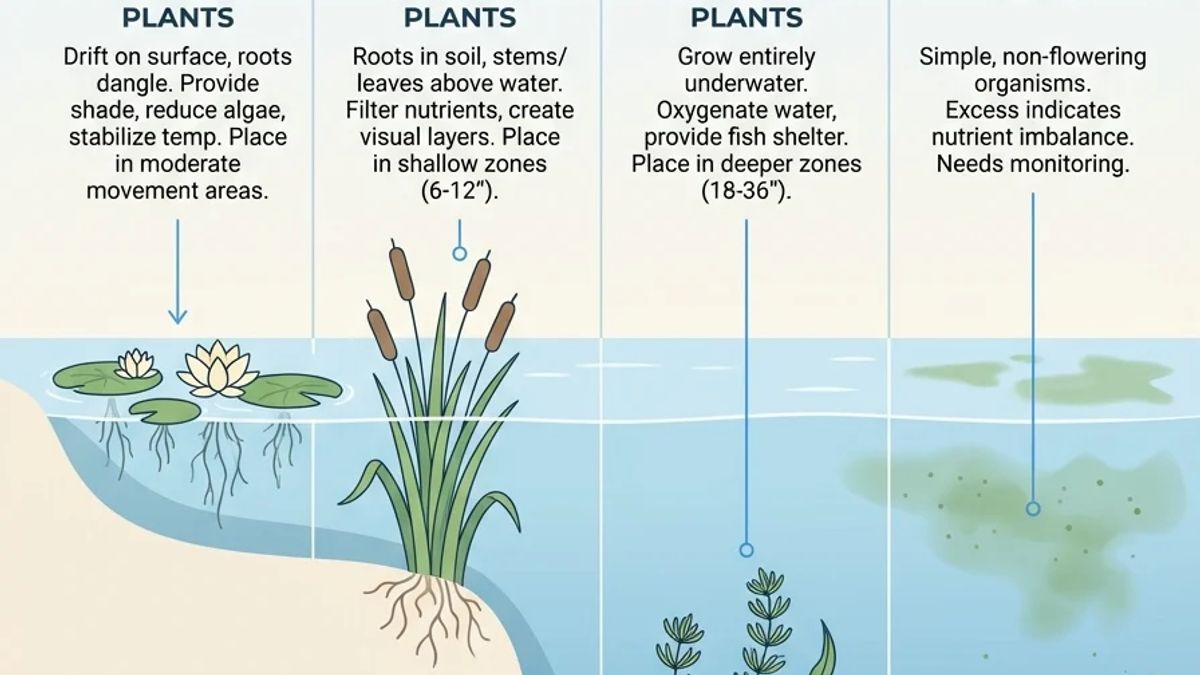
The Four Types of Pond Plants
Professional landscapers categorise pond plants into four main types:
1. Oxygenating Plants (Submerged)
These live in the deeper parts of the pond and remain underwater. They release oxygen directly into the water, keeping it healthy.
- Canadian Pondweed (Elodea canadensis)—fast‑growing and effective
- Water Milfoil (Myriophyllum spicatum)—good for deeper water
- Common Water Starwort (Callitriche stagnalis)—thrives in full sun or partial shade
Tip: Four to five bunches (each with three to four stems) is sufficient for each square metre of pond surface
2. Deep‑Water Plants
These have floating leaves and roots in the bottom of the pond.
- Water Lilies (Nymphaea)—need full sun (5–6 hours) to flower
- Fennel Pondweed (Potamogeton pectinatus)—grows in full sun or partial shade
3. Marginal Plants
These grow in shallow water around the edges of the pond, helping to blend the pond with the surrounding garden.
- Marsh Marigold (Caltha palustris)—bright yellow flowers, plant in water up to 15cm deep
- Yellow Flag Iris (Iris pseudacorus)—adds vertical interest
- Allegheny Monkey Flower (Mimulus ringens)—copes well in sun or partial shade
4. Floating Plants
These float on the surface, providing shade that reduces algae growth.
- Water Lettuce—good for smaller ponds
- Frogbit—native and wildlife‑friendly
Planting Tips
- Plant in late spring to early summer when the water is warming up
- Use aquatic planting baskets with aquatic soil, topped with gravel to weigh them down
- Keep about 50% of the surface free of vegetation for oxygen exchange
Section 7: Flowers and Plants Around the Pond Edge
The area around your tyre pond is just as important as the water itself. The right plants will soften the tyre's industrial look, attract pollinators, and provide shelter for wildlife.
Best Plants for Pond Edges
Bog Plants (perpetually wet to damp soil around the pond):
- Lobelia—adds vibrant colour and softens hard edges
- Primulas—bright spring flowers in damp conditions
Moisture‑Loving Perennials:
- Hostas—excellent foliage, shade‑tolerant
- Astilbes—feathery plumes of flowers
- Ferns—adds texture and woodland feel
Design Tips from Professional Landscapers
- Stagger plant heights so the pond blends into surrounding beds
- Use varied rock sizes on the pond margin
- Hide the liner with planting and stones
- Create a naturalistic look—avoid straight lines and formal arrangements
Wildlife‑Friendly Planting
- Position the pond near shrubs so wildlife feels safe crossing open ground
- Surround the pond with dense, prickly plants to provide protection for birds
- Avoid using poisons and baits near the pond—they kill non‑target animals
Section 8: Water Management and Oxygenation – Keeping Your Pond Alive
Stagnant water is a pond’s worst enemy. Without oxygen, the water turns foul, algae blooms take over, and wildlife cannot survive. Here’s how professionals ensure their ponds stay fresh and aerated.
Why Oxygenation Matters
- Oxygen supports beneficial bacteria that break down organic waste (leaves, fish waste, etc.).
- It allows fish and amphibians to breathe.
- It suppresses harmful algae by promoting a balanced ecosystem.
- It prevents the build‑up of toxic gases like hydrogen sulphide (rotten‑egg smell).
Natural Oxygenation – The Power of Plants
As mentioned in Section 6, oxygenating plants release oxygen during photosynthesis. They are the most effective and low‑cost way to keep your tyre pond healthy. Place them in weighted baskets or simply drop them into the deeper parts.
Mechanical Oxygenation – Pumps, Fountains, and Cascades
When natural methods aren't enough (e.g., in hot weather or if you have fish), consider:
- Solar‑powered fountains – gentle spray agitates the surface, increasing oxygen exchange. They run on sunlight and require no wiring.
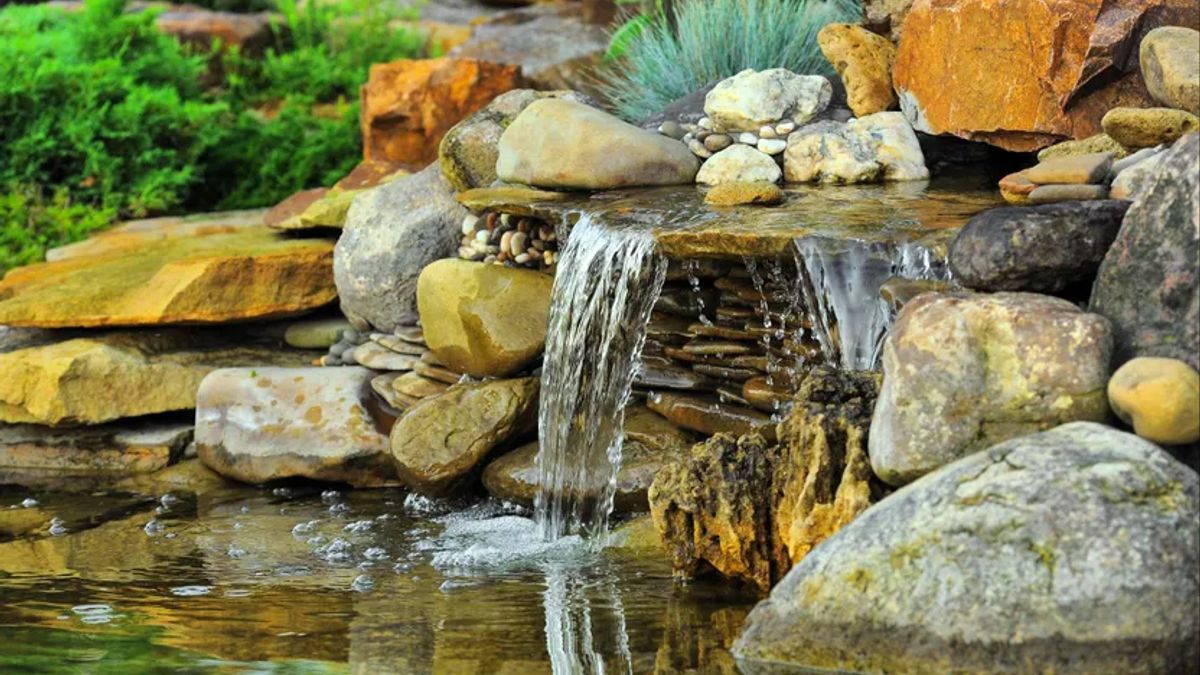
- Submersible pumps with a small waterfall attachment – recirculate water, creating aeration as water splashes back.
- Air pumps and diffuser stones – like those used in aquariums, they pump air into the water column.
Professional tip: Even a 5‑watt pump running for a few hours a day can significantly boost oxygen levels.
The Cascade Effect – Multi‑Tyre Waterfalls
One of the most stunning ways to oxygenate your pond is to build a cascade using multiple tyres at different levels. More on that in the next section.
Section 9: Cascading Tyre Ponds – Taking It to the Next Level
Why stop at one tyre? By stacking or linking several tyres on a sloping garden, you can create a tiered water feature that adds drama, movement, and extra oxygenation.
How to Build a Cascade
- Choose a slope – at least a 1:10 gradient so water flows naturally.
- Dig a series of ponds – each one a tyre (or half‑tyre) set into the ground at successively lower levels.
- Connect them with a stream – you can use a flexible hose or a small channel lined with liner.
- Install a pump at the bottom pond to pump water back to the top – this creates a continuous cycle.
- Add rocks and plants around each level to soften the transition.
Benefits of Cascades
- Superb oxygenation – the splashing water picks up oxygen at every drop.
- Visual interest – moving water is hypnotic and adds a relaxing sound.
- Increased wildlife habitat – different levels offer varied depths and niches.
- Flexibility – you can add as many tyres as your garden slope allows.
Section 10: Alternative Pond Construction Methods – Beyond Tyres
While tyre ponds are fantastic, they aren't the only option. Professional landscapers use a variety of techniques depending on budget, size, and style.
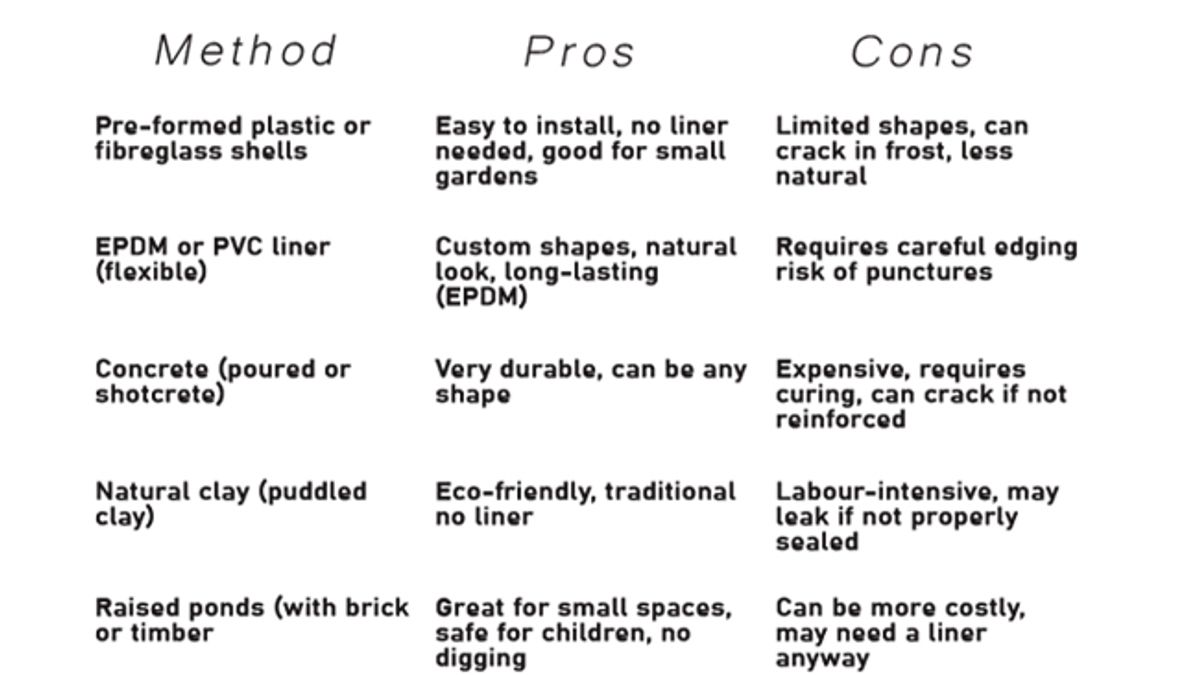
Which one is best? For most DIYers, flexible EPDM liner offers the best balance of cost, durability, and design freedom. A tyre pond is simply a clever way to use a liner within a recycled framework – you can also build a traditional liner pond without a tyre.
Section 11: A Small Business Enterprise – Turning Tyre Ponds into Profit
Your tyre pond project could be more than a hobby – it could become a profitable micro‑business. Here’s why it works:
- Low startup cost – tyres are often free (scrap yards, farms), and liners are affordable.
- Unique selling point – eco‑friendly, sustainable, and visually distinctive.
- Growing demand – more people want wildlife gardens and water features.
- Add‑on services – you can offer maintenance, planting design, or cascade installations.
How to Get Started
- Source tyres responsibly – build relationships with tyre recyclers or farm cooperatives.
- Build a portfolio – take photos of your first few ponds to show potential clients.
- Set clear pricing – charge for materials, labour, and travel. A typical tyre pond installation (including liner, rocks, plants, and labour) can range from £300–£800 depending on size and complexity.
- Market your green credentials – highlight the environmental benefits.
- Expand into cascades and maintenance – offer a complete package.
Remember: Always dispose of any waste responsibly and check local regulations regarding water features and wildlife protection.
Section 12: Ongoing Maintenance – The Final Touch
Seasonal Care
Spring:
- Add new plants from mid‑spring
- Divide and re‑pot water lilies if they've become too large
Summer:
- Cut back excess plant growth – keep about 50% of the surface clear
- Top up water levels if they drop significantly
- Keep water well oxygenated in hot weather (run pumps or fountains more often)
Autumn:
- Remove fading leaves and stems as they die back
- Cover with netting to catch falling leaves
Pump and Filter Maintenance
If you have a pump or filter:
- Pull pumps from the pond and clean them regularly
- Clean filters weekly – the interval depends on your pond's ecology
Monitoring Oxygen Levels
In hot weather, check the pond in the early morning – if fish are gasping at the surface, oxygen is low. Run an aerator or fountain immediately.
Conclusion: Your Tyre Pond Awaits
Building a garden pond from an old tractor tyre is one of the most rewarding garden projects you can undertake. It's sustainable, creative, and brings a slice of nature right to your doorstep. Whether you're creating a wildlife haven for frogs and newts or a tranquil water feature to sit beside on summer evenings, the principles in this guide will help you build a pond that's beautiful, safe, and built to last.
Remember: good planning prevents problems. Choose your location carefully, invest in a quality liner, build an escape ramp for wildlife, ensure proper oxygenation, and let nature do the rest.
Now grab that old tyre, roll up your sleeves, and start digging. Your pond is waiting – and who knows, maybe your next one will be the start of a new business!
[QUIZ:4]